Integrating Cypress into Your Drupal Workflow
Auteur(s) de l'article
🤔 Cyp’… Whaaaat ?
Cypress. This is a powerful JavaScript-based end-to-end testing framework designed to simplify the process of writing, running, and debugging tests for web applications.
Unlike traditional testing tools, Cypress operates directly in the browser, providing real-time feedback and robust debugging capabilities.
🎬 Cypress in Action
To illustrate the power of Cypress in a real-world scenario, consider Respawwwn.com — a daily gaming challenge platform that I recently created. On this platform, players identify games from videos, screenshots, 360° panoramas, or iconic sounds. The site relies heavily on JavaScript for its interactive elements and game mechanics.
“ For a project like Respawwwn, JavaScript testing is absolutely critical. ”
Cypress has been invaluable in automating the testing process by literally playing the game itself, interacting with the user interface just as a human would, and verifying that every feature functions correctly. This automated testing ensures we don’t break existing functionality when implementing new features or making changes to the codebase.
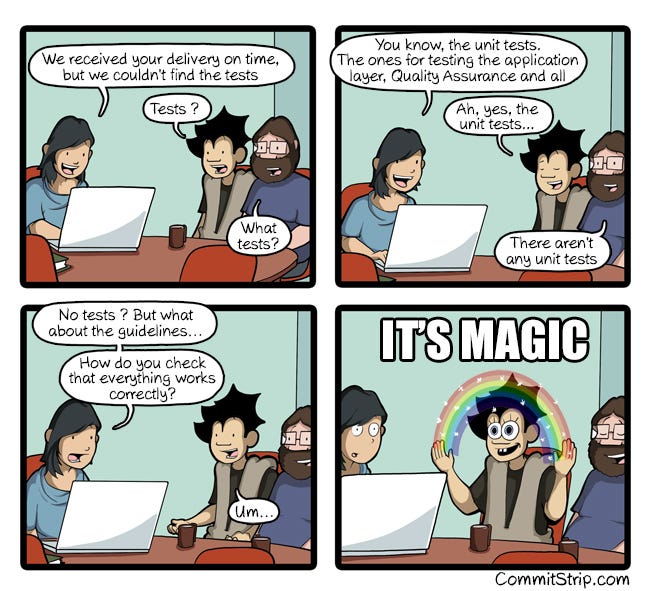
🧪 Should I tests or should I go ?
Testing is a critical component of any successful development project, ensuring functionality works as expected while preventing regressions when code changes are made. In Drupal projects, comprehensive testing is particularly important due to the complex interactions between core, contributed modules, custom code, and theme elements.
While Drupal projects typically employ multiple testing layers including PHPUnit for unit testing and Behat for behavior-driven development, Cypress excels at JavaScript interactions and user experiences.
This makes it ideal for testing:
- Interactive components such as Galleries, Carousels, Big Menu
- Autocomplete fields and search functions
- Dynamic form validations
- AJAX-powered interfaces
- Single-page behavior

💧Setting Up Cypress for Drupal
Installation Process
- First, install Cypress as a development dependency in your Drupal project:
npm install cypress --save-devThis command will:
- Update or generate a
package-lock.jsonfile - Create or update your
package.jsonwith a dependency entry like:
{
  "devDependencies": {
    "cypress": "^14.2.0"
  }
}- Run Cypress for the first time to initialize the installation:
npx cypress openYou’ll see a message confirming the installation and Cypress will open in your default Headless Browser
It looks like this is your first time using Cypress: 14.2.0

✔ Verified Cypress! /Users/username/Library/Caches/Cypress/14.2.0/Cypress.app

Opening Cypress..
Configuration Process
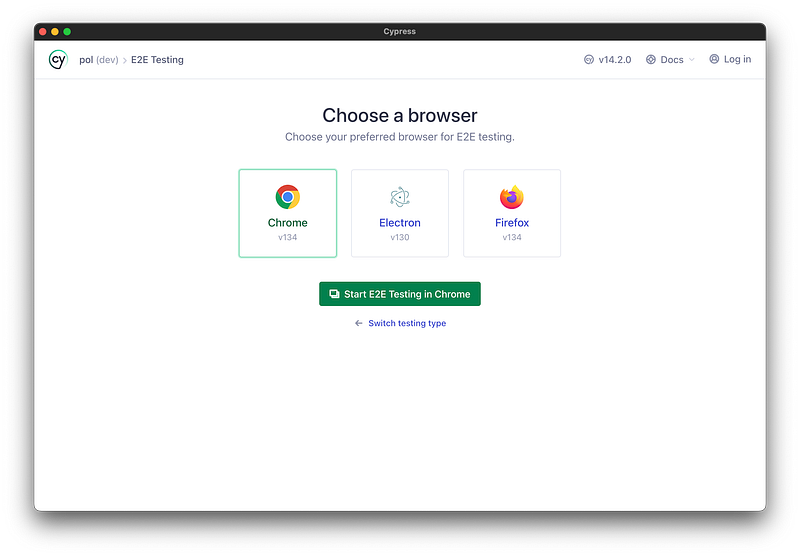
- After the initial setup screen (What’s New in Cypress), select “E2E Testing” in the newer window — which allows for complete website interaction testing (as opposed to Component Testing).

- Choosing the “E2E Testing” configuration wizard will generate the basic Cypress file structure

cypress.config.js
cypress
├── fixtures
│   └── example.json
└── support
    ├── commands.js
└── e2e.js- cypress.config.js: The main configuration file for Cypress E2E testing
- cypress/support/commands.js: A file for creating custom Cypress commands or overwriting existing ones
- cypress/fixtures/example.json: Example fixture data for use in tests
Here’s a typical Cypress configuration for a Drupal project:
const { defineConfig } = require('cypress')
module.exports = defineConfig({
  cookieDomain: 'test',
  fixturesFolder: false,
  video: false,
  pageLoadTimeout: 10000,
  e2e: {
    setupNodeEvents(on, config) {},
    baseUrl: 'http://my-website.test',
  },
  viewportWidth: 1600,
})
Make sure to change
my-website.test to your local development URL. If you're using Docker, this might be a container alias.- After configuration, Cypress will display a list of compatible browsers on your system. Select your preferred browser to continue.
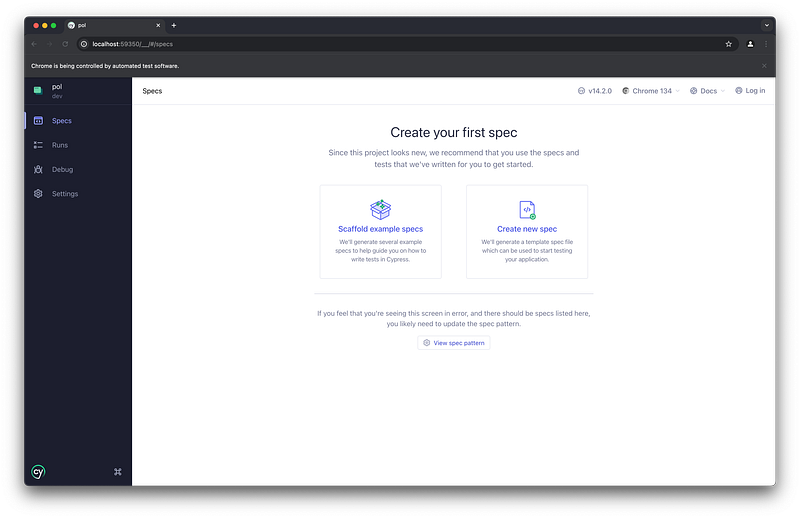
- You’ll now see the Cypress test runner interface, showing that you currently have 0 spec files (test files).
Create Your First Cypress Test
Now that Cypress is set up, let’s create your first test:
- Create a
*.cy.jstest file in thee2edir:
cypress
├── e2e
│ └── home.cy.js- Add the following test code to
home.cy.js:
describe('Homepage behavior', () => {
  it('should display the project title', () => {
    cy.visit('/');
    cy.get('h1').should('have.text', 'My Project');
  });
});
This simple test:
- Visits the homepage of your Drupal site
- Checks if an
h1element exists with the text "My Project"
- Run your test by executing
npx cypress openand selecting thehome.cy.jsfile from the test runner interface. You'll now see your test appear in the Specs list of the E2E testing page.
That’s it ! You just create your first Cypress tests Yay !!
🏃 Running Cypress
To run or open Cypress tests, use the following command:
npx cypress open --config baseUrl="http://localhost:8888"“ Note on npx: The npx command executes packages from the npm registry without requiring global installation. It's useful for running local packages like Cypress without adding them to your global environment. ”
To run tests in headless mode (useful for CI environments):
npx cypress run --config baseUrl="http://localhost:8888"Always adjust the
baseUrl parameter to match your environment.🍒 Tips — CI Integration of Cypress for Drupal
When integrating Cypress tests into a continuous integration pipeline, it’s valuable to preserve artifacts for debugging purposes.
Uploading Cypress Artifacts
For GitHub Actions, you can upload screenshot artifacts when tests fail:
- name: Upload Cypress Screenshot to Artifact
  uses: actions/upload-artifact@v4
  if: failure()
  with:
    name: cypress-screenshots
    path: |
      cypress/screenshots
Drupal-Specific CI Enhancements
To gain more context about failures in Drupal, it’s helpful to capture watchdog logs alongside Cypress artifacts:
- name: Print Watchdog errors to log/watchdog.csv
  if: failure()
  run: drush watchdog:show --count=100 --severity-min=3 --fields=wid,date,type,severity,message,location --extended --format=csv > log/watchdog.csv
- name: Upload Watchdog logs to Artifact
  uses: actions/upload-artifact@v4
  if: failure()
  with:
    name: watchdog-logs
    path: |
      log/watchdog.csv
Conclusion
One significant challenge with Cypress testing in Drupal is handling database-sensitive tests. Unlike Behat, where solutions exist for resetting database state between test scenarios (as detailed in this article on clearing data between Behat scenarios), implementing similar functionality in Cypress requires additional custom configuration.
By leveraging Cypress alongside other testing tools like Behat and PHPUnit, Drupal developers can create a comprehensive testing strategy that ensures both server-side functionality and client-side interactivity work as expected.
Sources
Kevin Wenger (2021) Behat on Drupal — clearing Data Between Scenarios.
https://wengerk.medium.com/behat-on-drupal-clearing-data-between-scenarios-c0447bd2745c
https://wengerk.medium.com/behat-on-drupal-clearing-data-between-scenarios-c0447bd2745c
Saul Costa (2016) Why You Should Write Tests.
https://saulcosta.com/why-you-should-write-tests-b581d8a6b6d2
https://saulcosta.com/why-you-should-write-tests-b581d8a6b6d2
Christoph Rumpel (2023) 3 Compelling Reasons For Developers To Write Tests.
https://christoph-rumpel.com/2023/6/three-compelling-reasons-for-developers-to-write-tests
https://christoph-rumpel.com/2023/6/three-compelling-reasons-for-developers-to-write-tests
Cypress (2025) Real World Testing with Cypress.
https://learn.cypress.io
https://learn.cypress.io
Resources
Respawwwn, https://respawwwn.com
Daily gaming quiz and example source for this article.
Daily gaming quiz and example source for this article.
Claude AI, https://claude.ai
Assisted with writing and refining my English.
Assisted with writing and refining my English.
DALL-E, https://openai.com
Generated the very accurate article’s cover illustration.
Generated the very accurate article’s cover illustration.
CleanShot X, https://cleanshot.com/
Companion Tool to take awesome Screenshots.
Companion Tool to take awesome Screenshots.